Create a Custom Threat Intel Source
This topic has information about setting up a custom threat intel source in CSE, which is a threat intel list that you can populate manually, as opposed to using an automatic feed.
You can set up and populate custom threat intel sources interactively from the CSE UI, by uploading a .csv file, or using CSE APIs. You can populate the sources with IP addresses, hostnames, URLs, email addresses, and file hashes.
How CSE uses indicators
When CSE encounters an indicator from your threat source in an incoming Record it adds relevant information to the Record. Because threat intel information is persisted within Records, you can reference it downstream in both rules and search.The built-in rules that come with CSE automatically create a Signal for Records that have been enriched in this way.
Rule authors can also write rules that look for threat intel information in Records. To leverage the information in a rule, you can extend your custom rule expression, or add a Rule Turning Expression to a built-in rule. For a more detailed explanation of how to use threat intel information in rules, see Threat Intel in the About CSE Rules topic.
Create a threat intel source from CSE UI
- Click the Content menu and select Threat Intelligence.
- Click Add Source on the Threat Intelligence page.

- Click Custom on the Add Source popup.

- On the Add New Source popup, enter a name, and if desired, a
description for the source.

- Click Add Custom Source.
Your new source should now appear on the Threat Intelligence page.
Enter indicators manually
- On the Threat Intelligence page, click the name of the source
you want to update.

- The Details page lists any indicators that have previously been
added and have not expired. Click Add Indicator.

- On the New Threat Intelligence Indicator popup.
- Value. Enter an IP address, hostname, URL, or file hash.
Your entry must be one of:
- A valid IPV4 or IPv6 address
- A valid email address
- A valid, complete URL
- A hostname (without protocol or path)
- A hexadecimal string of 32, 40, 64, or 128 characters
- Description. (Optional)
- Expiration. (Optional) If desired, you can specify an expiration date and time for the indicator. When that time is reached, the indicator will be removed from the source. When you click in the field, you’ll be prompted to select a date and time.
- Click Add.

- Value. Enter an IP address, hostname, URL, or file hash.
Your entry must be one of:
Upload a file of indicators
If you have a large number of indicators to add to your source, you can save time by creating a .csv file and uploading it to CSE.
Create a CSV file
The .csv file can contain up to three columns, which are described below.
| Column | Description |
|---|---|
| value | Required. Must be one of the following: - A valid IPV4 or IPv6 address - A valid, complete URL - A valid email address - A hostname (without protocol or path) - A hexadecimal string of 32, 40, 64, or 128 characters |
| description | Optional. |
| expires | Optional. The data and time when you want the indicator to be removed, in any ISO date format. For example: |
Example .csv file
value,description,expires mvtexco.com,EMEA guidance 22.333.22.252,Tante Intel,2022-06-01 01:00 PM
Upload the file
- On the Threat Intelligence page, click the name of the target custom source.
- Click Import Indicators.
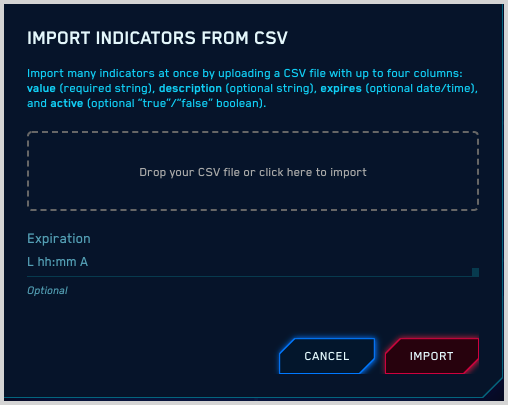
- On the import popup:
- Drag your file onto the import popup, or click to navigate to the file, and then click Import.
- Optionally, you can enter an expiration for the indicators on
the list. If you do, it will override any expirations that are
defined in the file. Enter the expiration in any ISO date
format. For example:
2022-12-31
Manage sources and indicators using APIs
You can use CSE threat intel APIs to create and manage indicators and custom threat sources. For information about CSE APIs and how to access the API documentation, see CSE APIs.

