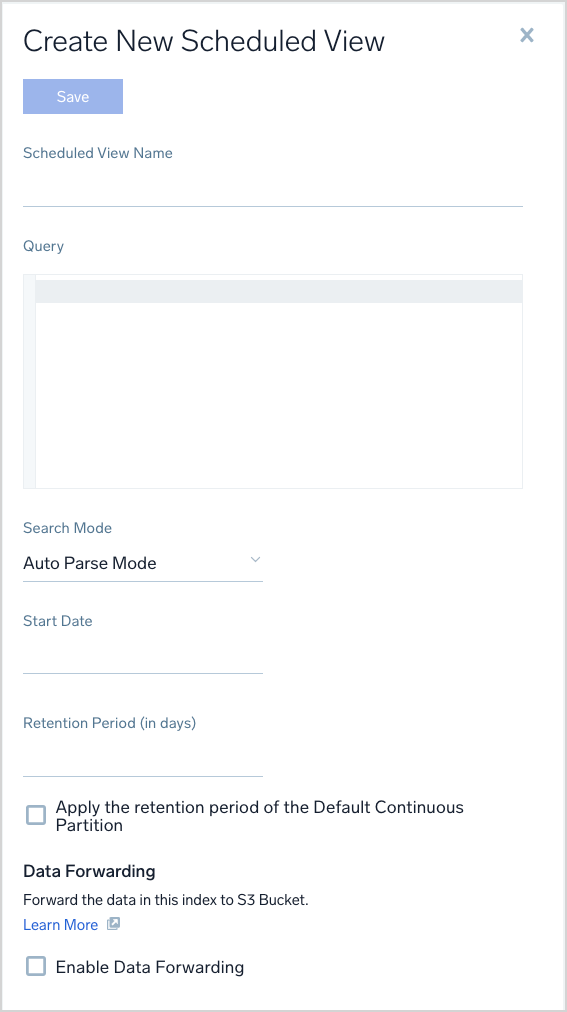
Add a Scheduled View
info
To create a Scheduled View you must be an admin or have the Manage Scheduled Views role capability.
For Scheduled View query requirements, see Scheduled Views Best Practices and Examples.
- In Sumo Logic, go to Manage Data > Logs > Scheduled Views.

- Click + Add Scheduled View.

- Scheduled View name. Enter a name for the view. You'll use this name in queries to search the view, so use a name that's descriptive and easy to remember. Names can contain alphanumeric characters; underscores (
_) are the only special characters allowed. View names can only have (A-Z, a-z, 0-9), $, and _ after the first letter. - Query. Enter the full query that encompasses the data you'd like indexed in the view. Parse operators and most search operators are supported in views.
- Search Mode. Set to Auto Parse Mode for Dynamic Parsing of JSON data. Manual Mode is the default search behavior.
- Start Date. Click the date that you'd like to use as the start time of the index. All data from that point forward will be indexed in the scheduled view. The oldest selectable date represents the end of the retention period of your Sumo Logic account.
- Retention Period. Either enter a retention period for the data in the index, in days, or click Apply the retention period of Default Partition. For more information, see Manage Indexes with Variable Retention.
- Data Forwarding. (Optional). Choose Enable Data Forwarding to forward data from Sumo to Amazon S3. The results from the Scheduled View are forwarded to S3. Raw logs are sent if the view query does not use an aggregate operator. If the view query performs an aggregation, aggregate results are sent. See File Format for details on how the file objects are structured.
- Click Save.
The view begins to index data as soon as you create it. Allow a few hours for the indexing to complete. If you've chosen to index a large amount of data and/or have chosen a long date range for the view, it could take a bit longer.
Once created, scheduled views are updated once per minute.

