Windows Sensor Installation
note
The CSE Windows Sensor has reached end of life and is no longer supported. Please migrate to a Sumo Logic Installed Collector. For more information see the end of life notice.
This topic has instructions for installing the Windows Sensor to send data to Sumo Logic CIP.
For information about Windows Sensor functionality, see Windows Sensor Overview.
Requirements
Physical system requirements
In order to successfully install and operate the CSE Windows Sensor, the following machine requirements must be met:
- Cores (CPU) * 2
- Memory (RAM) * 4GB
- Storage (Disk) * 50GB
- Operating System and Packages Windows 2012 or later (with all patches installed) or Windows 10 or later (with all patches installed) .NET, v4.8 or later
Security requirements
The CSE Windows Sensor installs as a Windows Service.
The sensor installer prompts you to supply a Windows Service Account that the CSE service will impersonate, that is, the user context under which the service will run. In most cases, you should use a dedicated Windows service account for the CSE Windows Sensor service.
The user account you specify can belong to any number of groups in the operating system, but certain ones are mandatory:
- Event Log Readers. This enables the sensor to read the event logs on the Microsoft Windows Domain Controllers. The service account must be a member of the Domain’s Event Log Readers group. If you intend to run the Localhost monitor, which is disabled by default, the service account must be a member of the local machine’s Event Log Readers group. If the Domain Controller Monitor is disabled, then the Service Account does not need to be in the domain’s Event Log Readers group.
- Performance Monitor Users. This enables the sensor to read CPU and memory usage telemetry. Without this information, the sensor will not run. The service account must be a member of the Iocal machine’s Performance Monitor Users group. If the sensor is installed directly on a domain controller, then the Performance Monitor Users group will be the domain’s Performance Monitor User’s group.
- Logon as a Service. The service account must be granted Logon as a Service privileges on the Microsoft Windows machine that it is installed on.
In limited circumstances, such as when the Sensor is configured to monitor only local event logs, it may be appropriate to run the Sensor service as Windows' built-in Local System account. The Local System account already has all permissions necessary to run the Sensor service.
Outbound internet communications requirements
If there is a firewall in place, you must enable rules for outbound communication to the appropriate Sumo Logic Endpoints on TCP Port 443:
TCP/443 <customer-prefix>.sumologic.comfor example: https://endpoint5.collection.us2.sumologic.com
Refer to Sumo Logic Endpoints for more details about firewall rules.
Before you install
Choose or create Domain Member Server
By default, the CSE Windows Service will monitor the event logs on every domain controller in your Microsoft Active Directory domain. Identify a Domain Member Server that belongs to the same Active Directory domain as the domain controller that you’d like to monitor. This is where you will install the Windows Sensor. If desired, create a new Domain Member Server.
Download the Windows Sensor installer
If you are a Phase 2 customer, download the CSE Windows Sensor installer using the download link for your deployment shown on Sensor Download Locations.
Set up Sumo Logic Collector and Source
In this step you configure a Sumo Logic Source on Sumo Logic CIP to receive the data that the sensor collects.
Set up a Sumo Logic Hosted Collector. For instructions, see Create a Hosted Collector.
Set up a Sumo Logic HTTP Source on the Hosted Collector you configured in the previous step. For instructions, see HTTP Logs and Metrics Source. When you complete the source configuration, you are presented with the URL for the source:
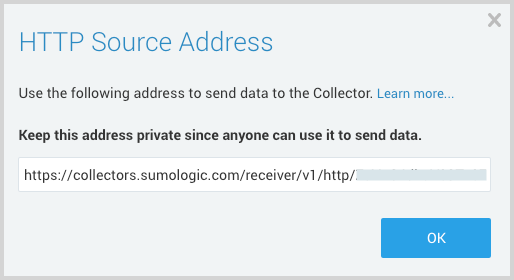
Copy and save the HTTP Source Address shown. When you install the Windows Sensor, you’ll be prompted to enter the URL.
Install the Windows Sensor
Copy the installer that you downloaded to the Domain Member Server.
Start the installer.
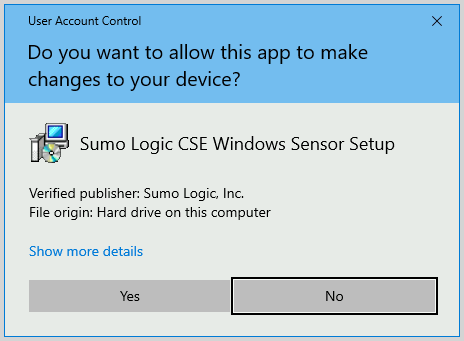
Windows prompts you to confirm that you want the installer to make changes to your system. Click Yes to continue.
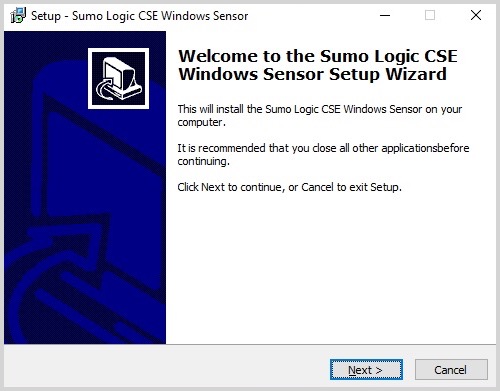
The installer asks if you want to start the installation. Click Next to proceed.
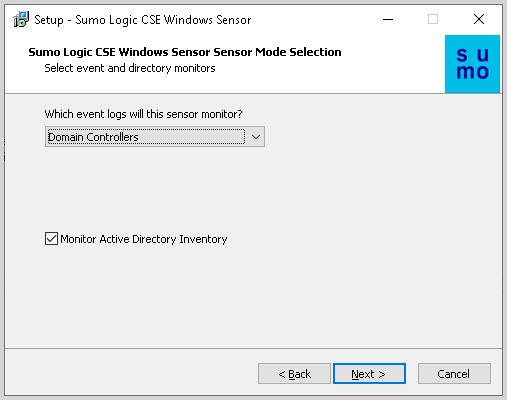
The installer prompts for information about what types of records the sensor will be monitoring. You can select one of the following:
Domain Controllers. Select this option to monitor security event logs from all Domain Controllers (up to 25) on the domain of the computer on which the sensor is installed. If you want the sensor to periodically poll for Active Directory entities, leave the Monitor Active Directory Inventory checkbox checked. (Active Directory monitoring requires that the computer where the sensor runs is a member of the domain to be monitored.)
Windows Event Collector. The sensor will monitor forwarded event logs from the computer you specify in the Hostname. To monitor events on the local computer where the sensor is installed, set Hostname to "localhost". If you want the sensor to periodically poll for Active Directory entities, leave the Monitor Active Directory Inventory checkbox checked. (Active Directory monitoring requires that the computer where the sensor runs is a member of the domain to be monitored.)
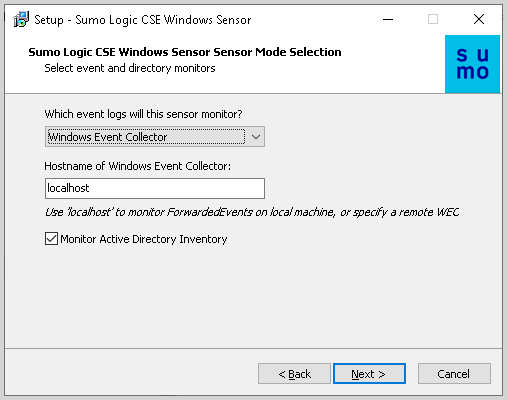
Local. Select this option to monitor Security event logs from the local computer that the sensor is installed on. By default, the Monitor Active Directory Inventory checkbox is not checked. If you want the sensor to checked to periodically poll for Active Directory entities, click the checkbox. (Active Directory monitoring requires that the computer where the sensor runs is a member of the domain to be monitored.)
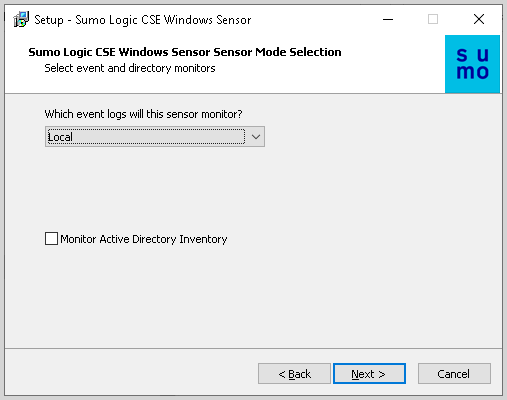
Click Next.
The installer prompts you to specify credentials for the Windows service account that will be used to run the sensor service. You have two options:
- Specify a Service Account. When the computer where the sensor runs is a member of a domain and/or will be monitoring a remote machine, using a service account is considered best practice for security reasons. If you choose this option, go to step 8 after clicking Next.
- Use Built-In Local System Account. Using the built-in account is a more streamlined process, and may be appropriate when monitoring event logs on the local machine. If you choose this option, go to step 11 after clicking Next.
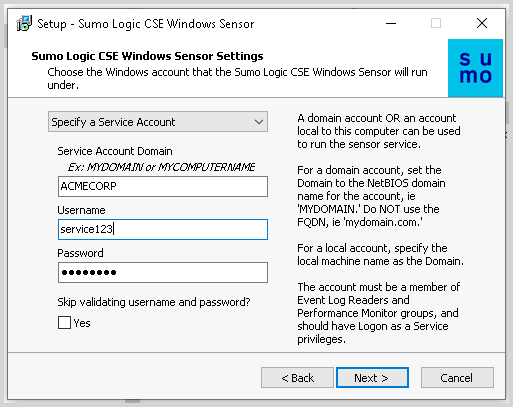
In this step, you enter credentials for the service account:
Domain. Enter the name of the Windows domain associated with the service account. This should be the NETBIOS name of the domain, such as MYDOMAIN, rather than the FQDN (mydomain.com). To use a local Windows account rather than a domain account, specify the local machine name here.
Username. Enter the username for the service account the sensor service will run under.
Password. Enter the password for the service account.
Skip validating. Leave the checkbox unchecked.
:::note The image below shows how you would specify credentials for the Windows service account
ACMECORP\service123. :::Click Next to proceed.
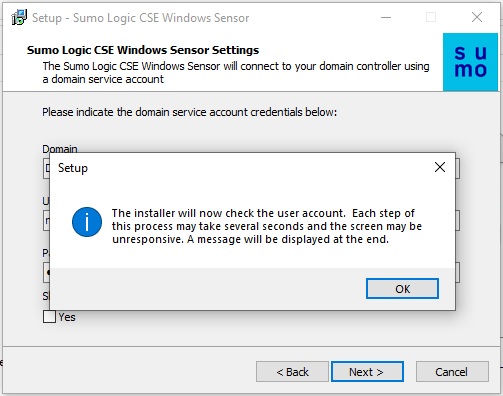
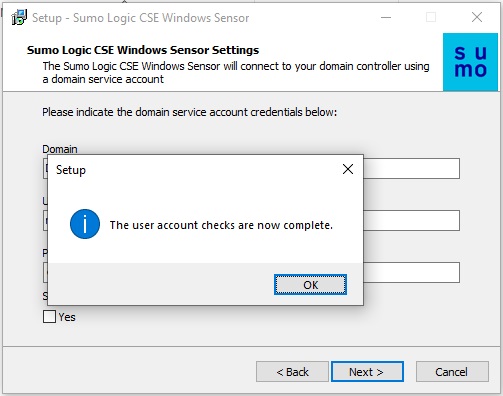
The installer starts to validate the account credentials you provided. Click OK to proceed.
The installer confirms that the account validation succeeded. Click OK to proceed.
The installer prompts you to enter a Sensor address which is the URL to which the sensor will send the data it collects. Enter the Sumo Logic HTTP Source URL that you copied and saved when you created the HTTP source. An HTTP Source URL starts like this:
https://collectors.sumologic.com/receiver/v1/http/…The installer reports that the installation is completing. Click Finish.
Follow the instructions in Verify the service is running below.
Install the Sensor from the Command Line
This section has instructions for using the Windows Sensor command line installer. These instructions apply to CSE Windows Sensor Version 1.11 (and higher).
You can use the command line to do a fresh install of the Windows Sensor, to upgrade an existing installation to a newer version, or to uninstall the sensor.
When you do a fresh install, you set a few sensor configuration options that control basic sensor operation. Further customization of sensor behavior can be accomplished by manually modifying the sensor’s settings.conf file after installation is complete. When you upgrade the sensor to a new version, the sensor configuration options that were set in the prior installation are preserved, as are the options configured in the sensor’s settings.conf file.
General installation options
The options in this section relate to both new and upgrade installations. These options can only be provided on the command line. None of these options are required.
/VERYSILENT - The installer won’t display any user interface elements, so you won’t see the installation wizard and progress window.
/SUPPRESSMSGBOXES - The installer won’t prompt you for any information during the install process. You must provide installation options in the .INF file or at the command line. If you don’t provide required information, the installer will use default values whenever appropriate. This flag works only in conjunction with the /VERYSILENT flag.
/CLOSEAPPLICATIONS - The installer will automatically close any applications that use files that the installer will update. Typically, this flag is necessary for upgrades and uninstalls. Note that the installer must run as an administrator to be able to stop the existing sensor service. If the installer needs to close a file and is unable to, it will request a Windows restart.
/LOG=”filename” - The installer will create a log file in the location specified by filename that details the actions performed during the installation process. This flag can be useful in troubleshooting why an installation didn’t run as expected. Be sure to choose a file location to which the
installer will have write access. If you use the LOG flag without specifying a file name, the log file will be written to the TEMP directory of the user running the installation.
/DONOTUPGRADE - By default, if the installer detects an earlier version of the CSE Windows Sensor already installed, it will upgrade the installation in place, preserving the existing settings—the ones configured previously by the installer and also the options configured in settings.conf. If you don’t want an existing sensor installation to be upgraded, include this flag on the command line. You might use this option in the event that you are expecting to do a new install, and want the installer to fail if it detects an existing version of the sensor on the target computer.
Windows service account options
The options defined in this section provide credentials for the Windows Service account that will run the sensor service. When the computer where the sensor runs is a member of a domain and/or will be monitoring a remote machine, using a service account is considered a best practice for security reasons. When you specify a service account, Domain, Username, and Password must ALL be supplied. If you don’t provide credentials to the installer, the sensor will default to running under the Built-In Local System Account.
note
These options are applied to new installations only. When you run the installer, if it detects an existing version of the sensor, it will ignore any service account options you provide.
You can provide these options at the command line or in an .INF file.
/DOMAIN="MYDOMAIN" - The name of the Windows domain associated with the service account. This should be the NETBIOS name of the domain, such as MYDOMAIN, rather than the FQDN (mydomain.com). To use a local Windows account rather than a domain account, specify the local machine name.
/USERNAME="user" - The username for the service account the sensor service will run under.
/PASSWORD="password" - The password for the service account.
/SKIPSERVICEACCOUNTVALIDATION - If you include this option, the installer will skip checks that verify that the credentials specified are both valid and have sufficient permissions for the sensor service to operate properly. Typically, you would use this option only when troubleshooting, as it allows the installer to complete successfully, but the sensor will likely not be able to start without additional, manual steps.
Sensor configuration options
This section describes options that control the behavior of the Windows Sensor. These options are applied to new installations only. When you run the installer, if it detects an existing version of the sensor, any sensor configuration options provided are ignored.
You can provide these options at the command line or in an .INF file.
/ADDRESS="https://endpointX.collection.usX.sum...http/loremip==" - The URL to which the sensor sends the data it collects, an HTTP Source on the Sumo Logic platform. This setting is required for all new installations.
/SENSORMODE=”local” - The option determines which event logs the sensor will monitor. If the /SENSORMODE is not specified, the sensor defaults to Local event
log monitoring. The value is not case-sensitive. Options are:
- DC - Choose this option to monitor security event logs from all Domain Controllers (up to 25) on the domain of the computer on which the sensor is installed.
- WEC - The sensor will monitor forwarded event logs from the computer you specify in the WECHostname setting
- Local - Select this option to monitor Security event logs from the local computer that the sensor is installed on.
/WECHOSTNAME=”localhost” - This option, used only when /SENSORMODE=”WEC”, specifies which computer to monitor for event logs. If you configure WEC mode and don’t configure WECHostname, the sensor defaults to monitoring localhost, the local computer where the sensor is installed.
/MONITORACTIVEDIRECTORY - If you include this option, the sensor will periodically poll for Active Directory entities. (Active Directory monitoring requires that the computer where the sensor runs is a member of the domain to be monitored.) If you don’t include this option, Active Directory monitoring will be turned on for DC mode or, when a remote WECHostname is specified, WEC mode. For local monitoring, Active Directory monitoring is turned off by default.
Specifying sensor options in an .INF file
/INFFILE="C:\Users\user\Documents\CSEWindowsSensorSettings.inf"
When you include this option, the installer will use the options defined in the specified .INF file rather than any that may have been included on the command line. The .INF file must be formatted using standard INF file syntax. For information about this syntax, see About INF File Architecture in Microsoft help.
Sensor options must be included in a section named Params. Those options include:
sensorModewecHostNameaddressdomainusernamepasswordmonitorActiveDirectory— This is a boolean option. Use 0 for false, or 1 for true.skipServiceAccountValidation— This is a boolean option. Use 0 for false, or 1 for true.
For more information about the options, see Sensor configuration options and Windows service account options.
Example .INF file
[Params]
Address=https://endpointX.collection.usX.sum...http/loremip==
Domain=MYDOMAIN
Username=user
Password=password
SensorMode=DC
MonitorActiveDirectory=0
Command line install examples
New Installation - Local Sensor Mode using Local System Account (Defaults)
SumoLogicCSEWindowsSensor_v1.11.7809.31990.exe /VERYSILENT /SUPPRESSMSGBOXES /ADDRESS="https://endpointX.collection.usX.sum...http/loremip=="
New Installation - Domain Controller Installation with Service Account
SumoLogicCSEWindowsSensor_v1.11.7809.31990.exe /VERYSILENT /SUPPRESSMSGBOXES /ADDRESS="https://endpointX.collection.usX.sum...http/loremip==" /SENSORMODE="DC" /domain="MYDOMAIN" /username="user" /password="password"
New Installation - Domain Controller Installation with Service Account, from .INF file
SumoLogicCSEWindowsSensor_v1.11.7809.31990.exe /VERYSILENT /SUPPRESSMSGBOXES /INFFILE="C:\Users\user\Documents\DCwithServiceAcct.inf" /LOG="C:\SensorInstall.log"
DCwithServiceAcct.inf contents:
[Params]
Address=https://endpointX.collection.usX.sum...http/loremip==
Domain=MYDOMAIN
Username=user
Password=password
SensorMode=DC
Upgrade installation - Settings from currently installed sensor are retained
SumoLogicCSEWindowsSensor_v1.11.7809.31990.exe /VERYSILENT /SUPPRESSMSGBOXES /CLOSEAPPLICATIONS
Uninstall the sensor
“C:\Program Files\Sumo Logic\CSE Windows Sensor\unins000.exe” /LOG="C:\SensorUninstall.log" /VERYSILENT /SUPPRESSMSGBOXES /CLOSEAPPLICATIONS
Verify the service is running
To verify that the Windows service that runs the sensor is running, check Windows Service Control Manager to see that the SLCSE process is running, set to automatic, and running as the user you expect. (Start > Control Panel > Services)