Install Sumo Logic Apps
Learn how to install apps from the library and to multiple environments.
Install Apps from the Library
| Account Type | Account Level |
|---|---|
| Cloud Flex | Trial, Professional, Enterprise |
| Credits | Trial, Essentials, Enterprise Operations, Enterprise Security, Enterprise Suite |
Certain apps have specific installation requirements. Be sure to check the instructions for your application for specific instructions.
important
Applications can be installed only by users with a Sumo Logic Professional or a Sumo Logic Enterprise account. Organizations with a Sumo Logic Free account currently cannot use Sumo Logic Applications.
To install an application:
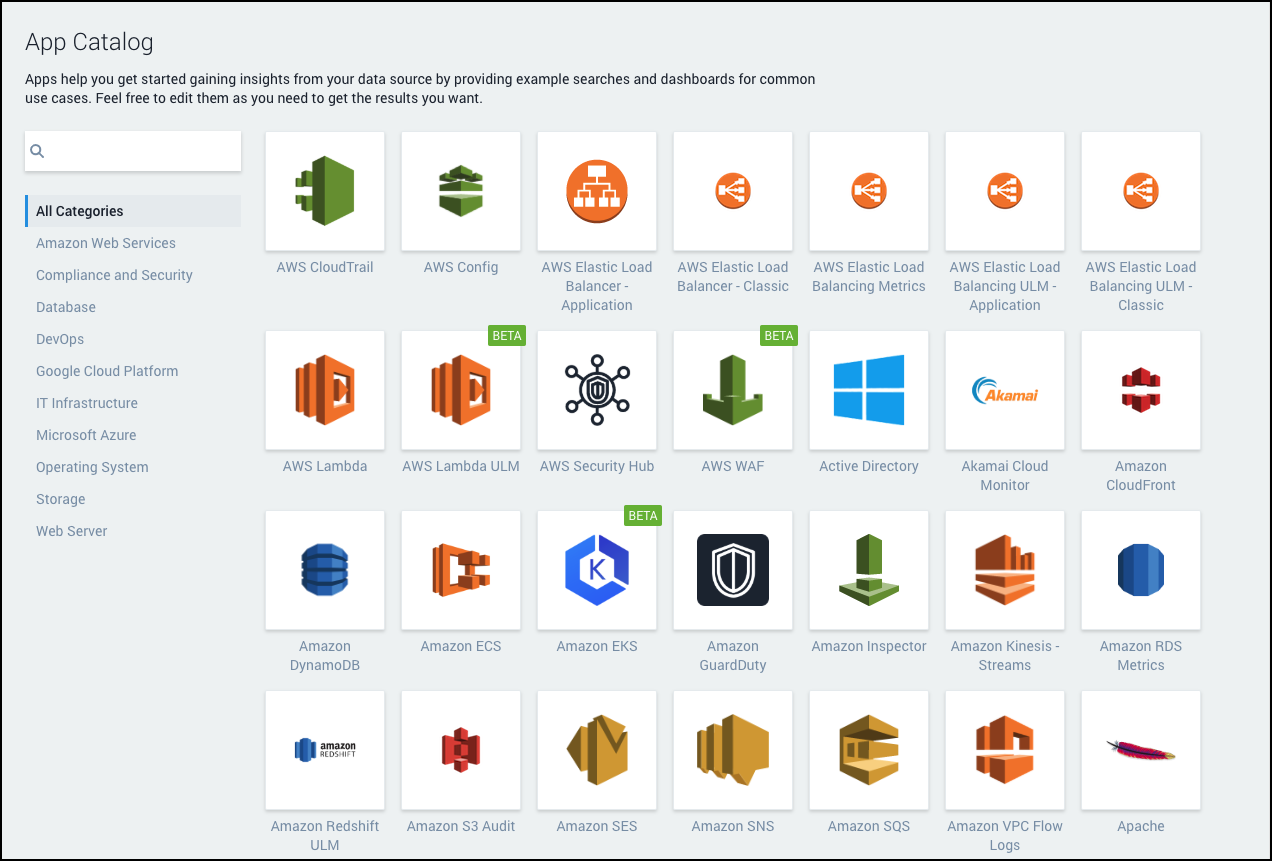
From the left nav, select App Catalog.
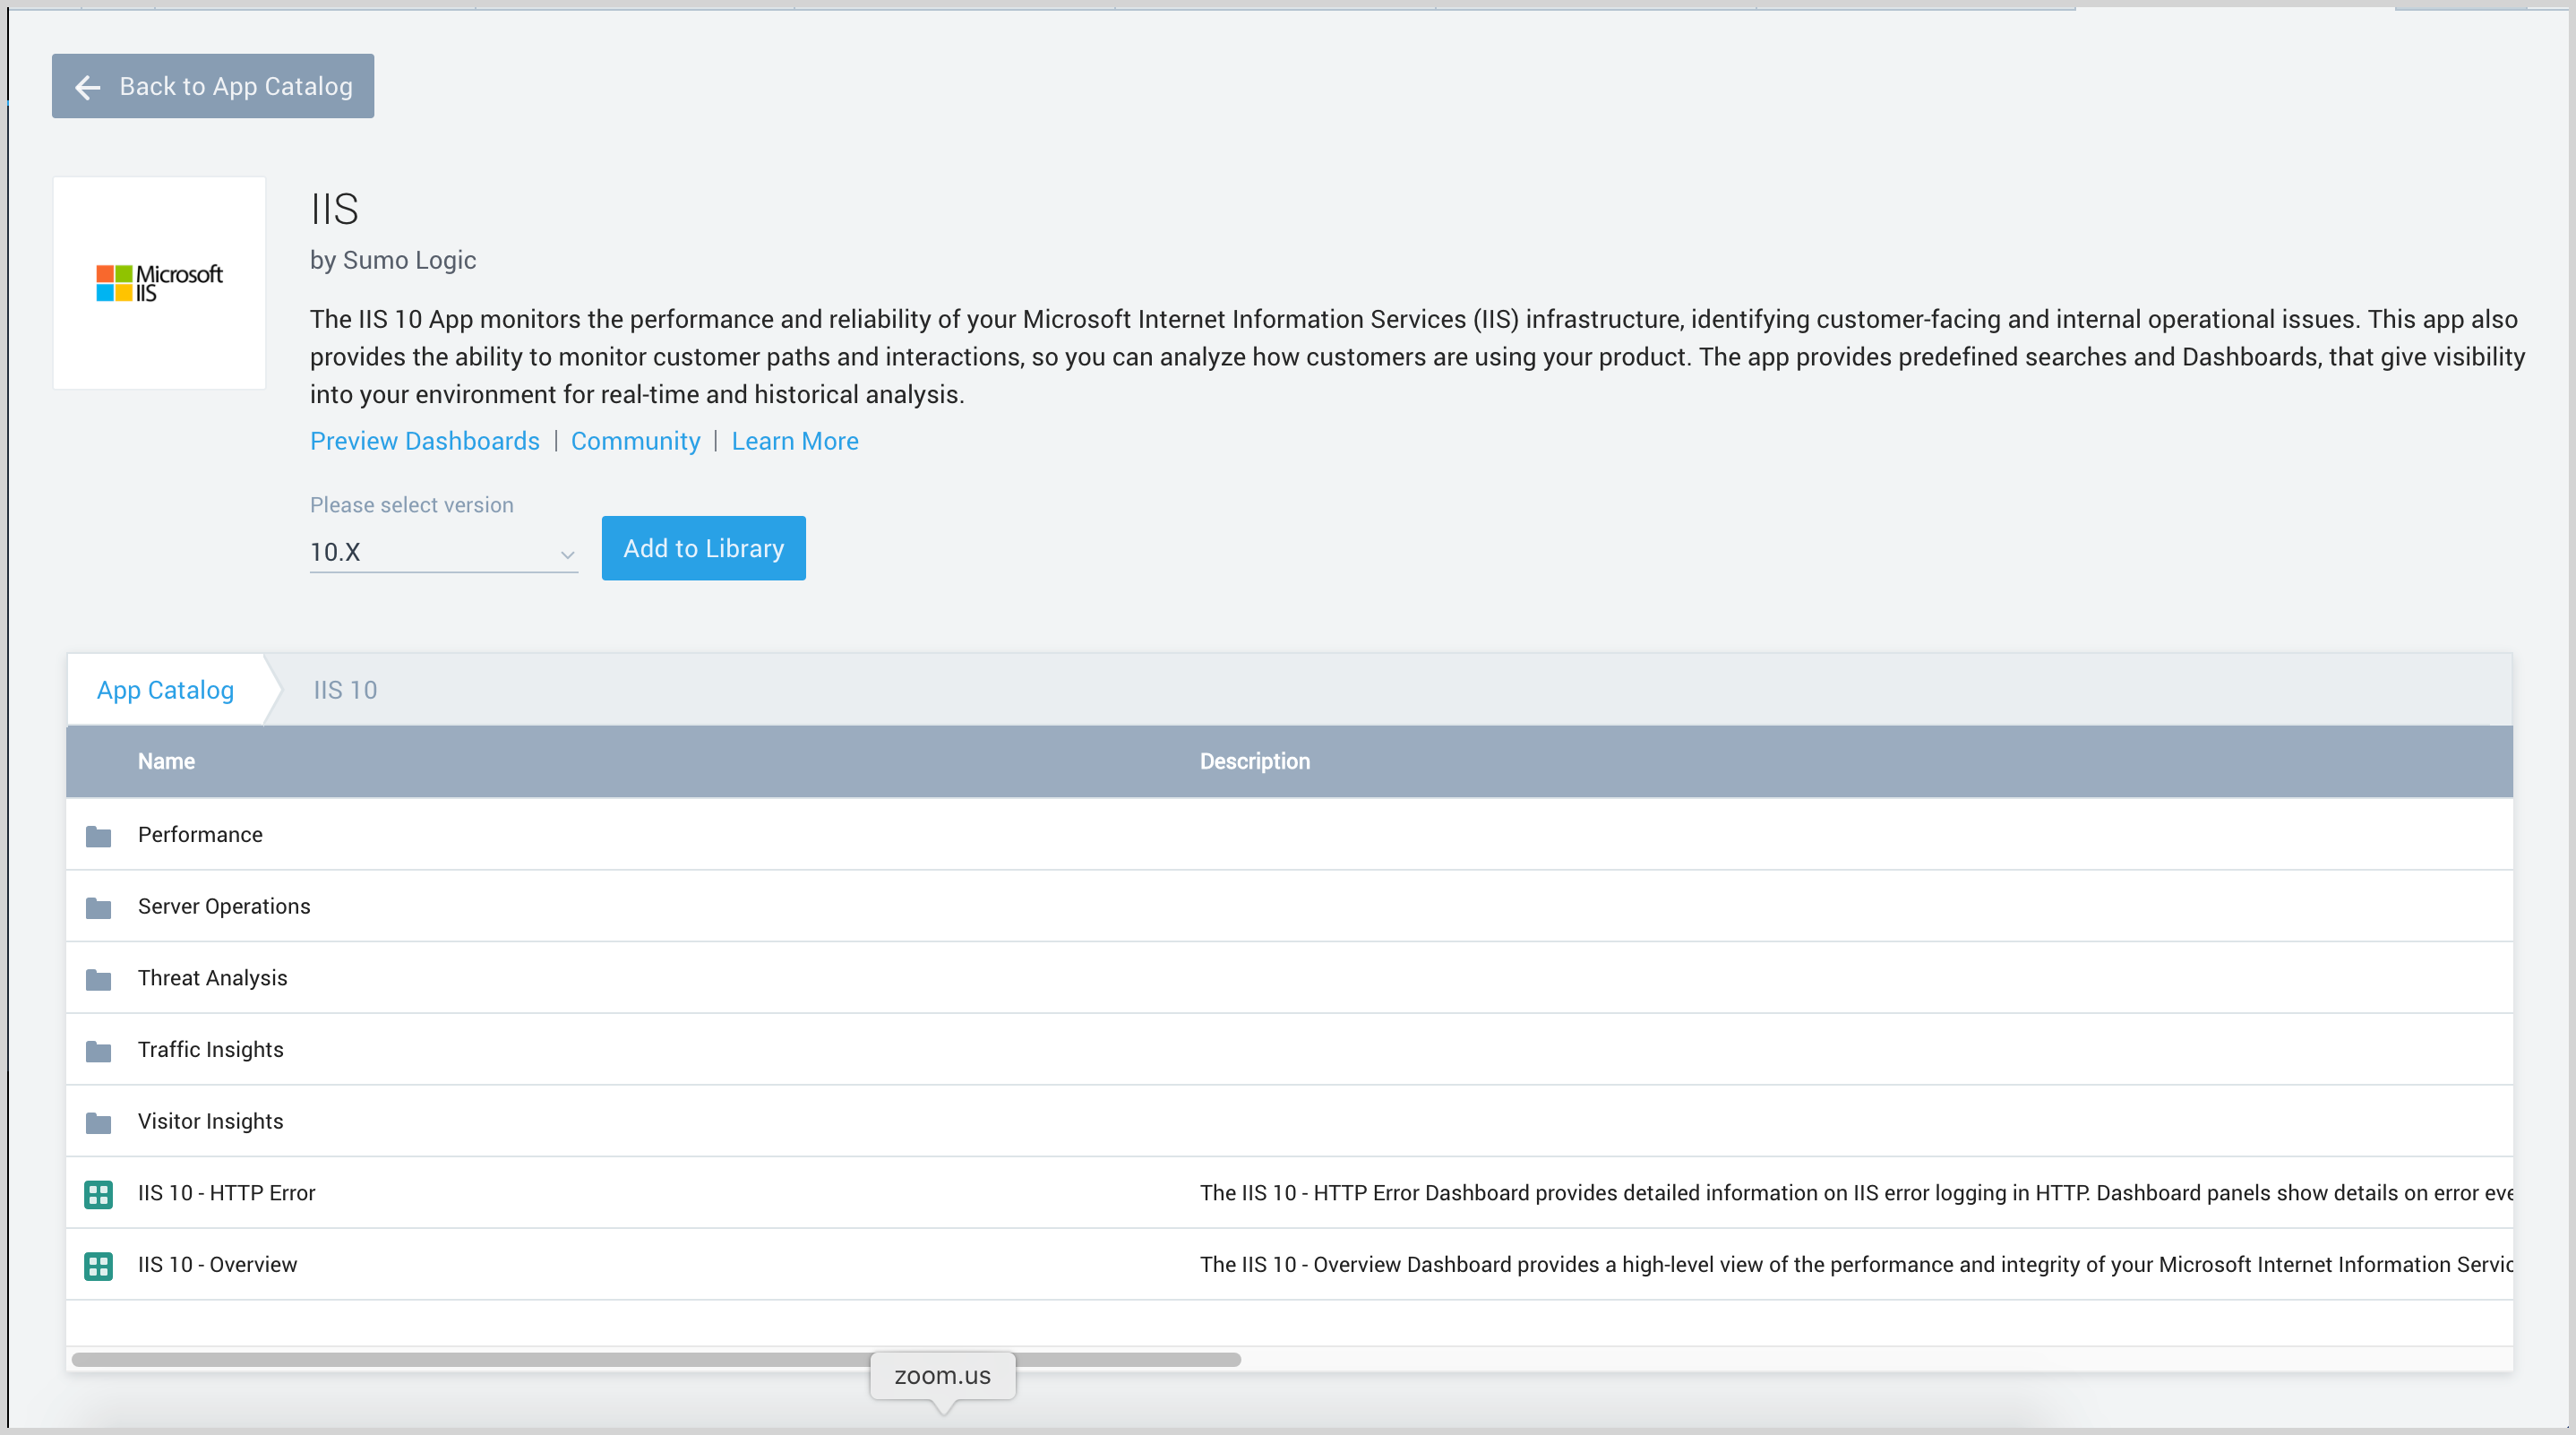
Click the name of the app you'd like to install.

Select the version of the service you're using and click Add to Library. Version selection is applicable only to a few apps currently.

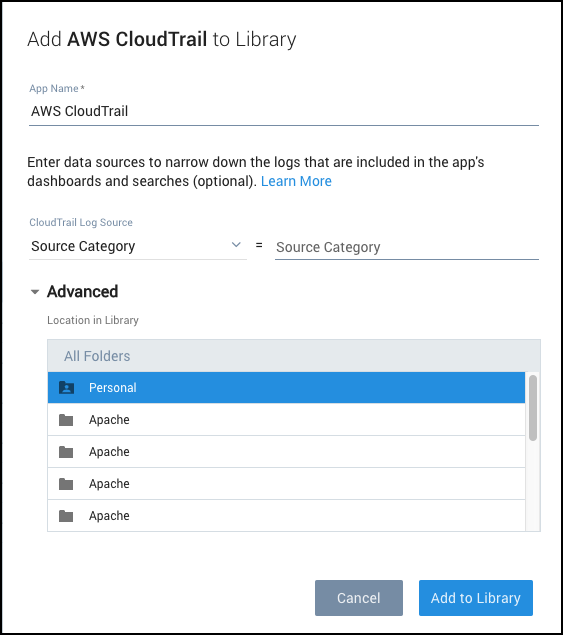
In the the Add to Library popup:

App Name. You can retain the existing name, or enter a name of your choice for the app.
Log Source. Select either of these options for the data source.
- Choose Source Category, and select a source category from the list.
- Choose Enter a Custom Data Filter, and enter a custom source category beginning with an underscore. Example: (_sourceCategory=MyCategory). For more information see Custom Data Filters.
Advanced. (Optional) Select the Location in Library, the default is the Personal folder in the library.
Click Add to Library.
Once an app is installed, it will appear in the folder you selected. Your Personal folder is selected by default. From here, you can share it with your organization.
Panels will start and fill automatically. Each Panel slowly fills with data matching the time range query and received since the Panel was created. Results won't immediately be available, but with a bit of time you'll see full graphs and maps.
Install Apps in Multiple Environments
If you have multiple environments generating data that you want to monitor using Sumo Logic Apps—for example, environments for production, development, and testing—you’ll need to perform the following steps in each environment:
- Set up Sumo Logic Collectors and Sources for each environment. Make sure that Source Hosts and Source Categories are named correctly in order to clearly indicate the environment name to the Apps when they are installed.
- Perform any prerequisites required for the particular Sumo Logic App in that environment. Each Sumo Logic App has unique requirements, so make sure to follow the specific instructions for that App.
- Install an instance of the Sumo Logic App for each environment, configure it to accept data from that environment, and rename the App to reflecting the deployed environment.
Your data comes in from each of your environments (production, development, testing, etc.) into the corresponding installed Sumo Logic App. The environment data and its Sources are identified by Host Names and Source Categories as configured by you or your administrators.
Example Installation
In this example, a company has three environments: qa, prod, and perf. You will configure the Sumo Logic Collectors and Sources to identify each environment correctly, perform any necessary prerequisites for the Sumo Logic App, then finally install an instance of the App for each of your environments.
Set up Sumo Logic Collectors and Sources
Before installing any applications, define your Collectors in each environment so that Source Host metadata indicates the deployment. For example, name them something like:
- abc13-qa-cluster01
- acb10-prof-cluster03
- abc01-prod-cluster12
Optionally, you can set a Source Category to indicate these names as well, depending on how Sumo Logic is architected at your company.
Perform any Prerequisites required for the Sumo Logic App
Each Sumo Logic App has unique requirements, so make sure to follow the specific instructions for that App. For details, see Sumo Logic Apps.
Install an Instance of the Sumo Logic App for each Environment
Install an instance of the Sumo Logic App for the first environment, qa.
- If you have used Source Host to identify the environment, in the Install Application dialog, you can configure the app with a custom data filter using _sourceHost=qa.
- If you have used a Source Category to delineate the deployment, when installing the app, you could configure it using the Source Category _sourceCategory=qa-abc.
- Rename the title of the App to denote the environment it is configured for, for example, Windows-QA.
Next, install an instance of the Sumo Logic app for the prod environment.
- In the Install Application dialog, indicate the name of the environment in the Source Host, such as _sourceHost=prod.
- Rename the title of the App to denote the environment it is configured for, for example, Windows-Prod.
Finally, install an instance of the Sumo Logic app for the perf environment.
- In the Install Application dialog, indicate the name of the environment in the Source Host, such as _sourceHost=perf.
- Rename the title of the App to denote the environment it is configured for, for example, Windows-Perf.
Troubleshooting
If you've installed a Sumo Logic App and no data appears in its Dashboards, you may have chosen the wrong Source Category.
Apps are dependent on the Source Category metadata associated with your logs. This metadata is established when Collectors and Sources are configured. Because each organization uses their own metadata methodology check with your Sumo Logic account's Administrator to get a better idea of which Source Category would be the best fit for a given app.
How can I change the Source Category associated with an app?
To change the Source Category used by an app, you can simply reinstall the same app. Currently, apps cannot be uninstalled or edited in any other way.
For more information, see Custom Data Filters.