Create and Edit Users
This page has instructions for creating and editing users in Sumo Logic. For information about deleting a user, see Delete a User.
Create a user
To create a user:
Go to Administration > Users and Roles > Users.
Click the + Add User on the upper right side of the page.
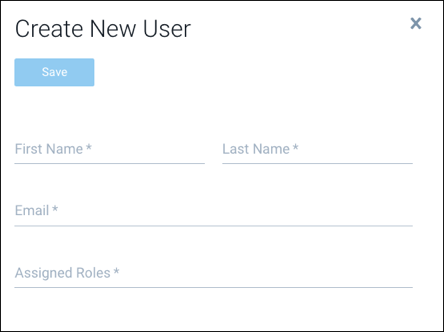
The Create New User pane appears on the right side of the page.

First Name. Enter the user’s first name.
Last Name. Enter the user’s last name.
Email. Enter the user’s email address. We recommend that the email match one of your corporate domains of your Sumo Logic account and not be sent to a personal account. For new users, Sumo Logic automatically sends a temporary password to the user at the email address you've entered. A user who logs in to Sumo Logic for the first time is prompted to change the temporary password.
Assigned Roles. Click in this field to display a list of Sumo Logic roles. Click a role to assign it to the user. For more information about roles, see Role-Based Access Control. If you select multiple roles, the user is given highest level of access of all the assigned roles.
Repeat the previous step to assign additional roles to the user.
Click Save when you are done assigning roles to the user.
important
When you add or remove a role from a user, it can take about an hour for the RBAC changes to take effect on an existing real-time alert. For example, when a user creates a real-time alert, the user’s search filter governs what log data is returned by the scheduled search. If an admin subsequently makes that user’s search filter more restrictive or removes that role from the user, for about an hour, alerts triggered by data that the user’s updated search filter now prohibits will still fire. (Changes take effect immediately for manually run searches.)
View a user
Go to Administration > Users and Roles > Users.
Click the row for the user you want to view.
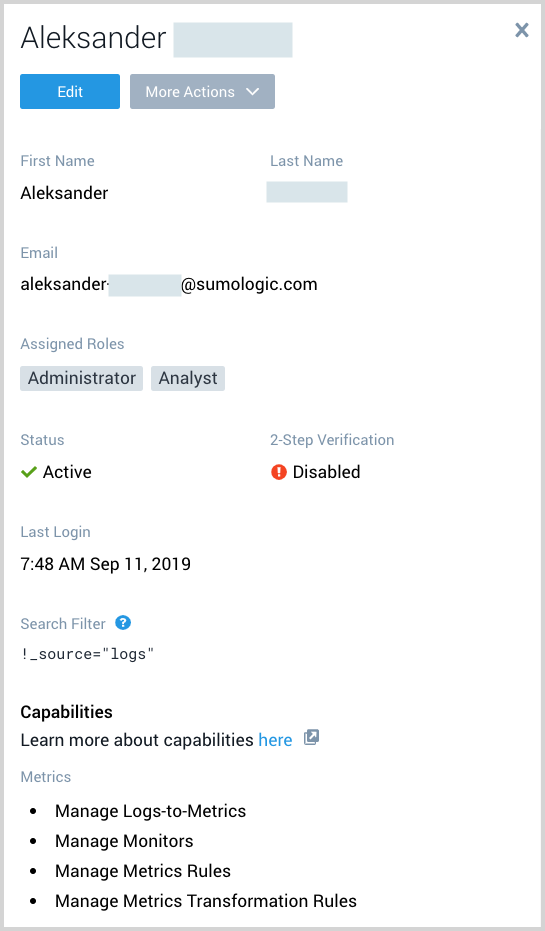
A pane appears on the right side of the page with the user's details.

The page displays:
- The user's first and last name, and email address.
- The roles assigned the user.
- The user's account status.
- Whether or not 2-step verification is enabled for the user.
- The user's role search filter.
- The capabilities that the user's roles grant.
Edit a user
Go to Administration > Users and Roles > Users.

Select the row for the user you want to edit and choose Edit from the three-dot options menu.
An edit pane appears on the right side of the page. For information about edit options, see Create a user above.
After editing the user, click Save.