Visualize GitHub Data in Sumo Logic
This guide will walk you through creating a Sumo Logic account as well as getting GitHub data visualized in Sumo Logic. At the end, you will have:
- A Sumo Logic trial account if you don't already have an existing account
- GitHub dashboards and data collection configured in your Sumo Logic account
- A GitHub webhook configured that will send data to your Sumo Logic account
For trial accounts, all of the data collected as a result from this guide will be free of charge.
Prerequisites
This guide will use a helper script to automate much of the setup process. The following operating systems and architectures are supported:
- MacOS 64-bit Intel
- Linux 32-bit and 64-bit
note
Arm architectures for either Linux or Mac are not yet supported.
Step 1 - Create a trial account
If you already have a Sumo Logic account, you can skip this step and go straight to Step 2.
note
Remember your deployment region selection. You will need it in a later step.
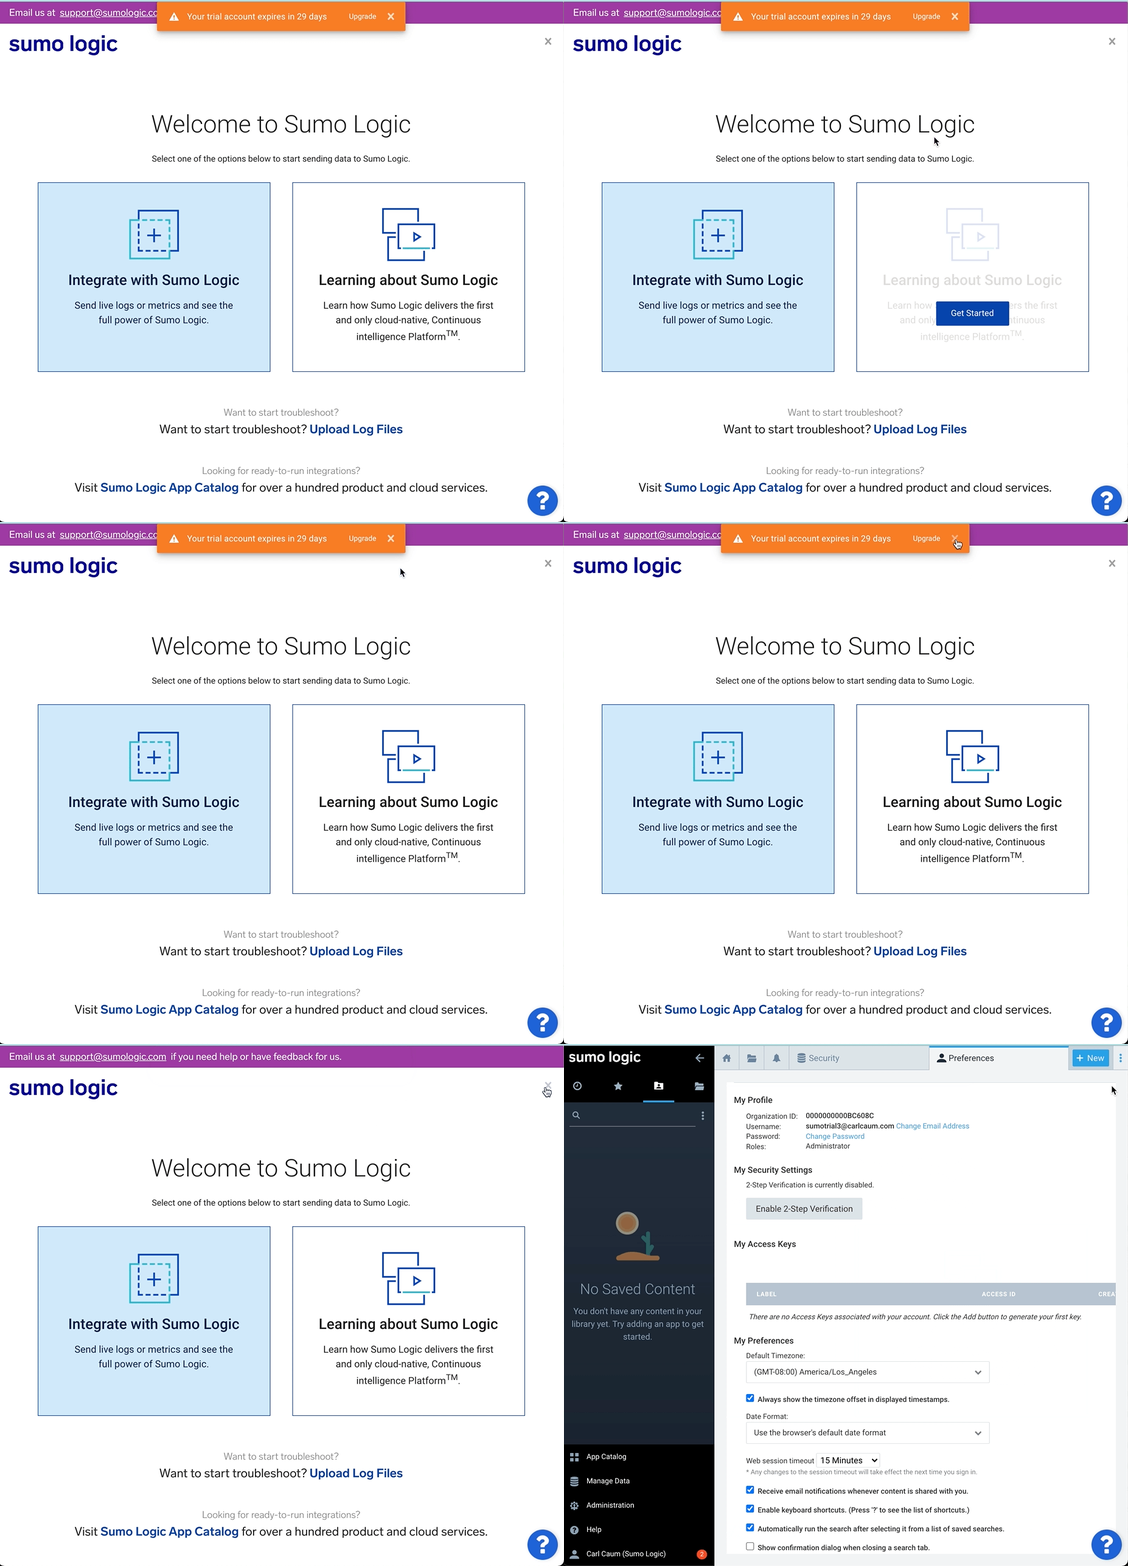
Visit sumologic.com and create a trial account by clicking Start free trial.
Once your account is activated, click the
at the top right of the Welcome to Sumo Logic web page. You will not need to follow the in-application guide.

Step 2 - Create a Sumo Logic access key
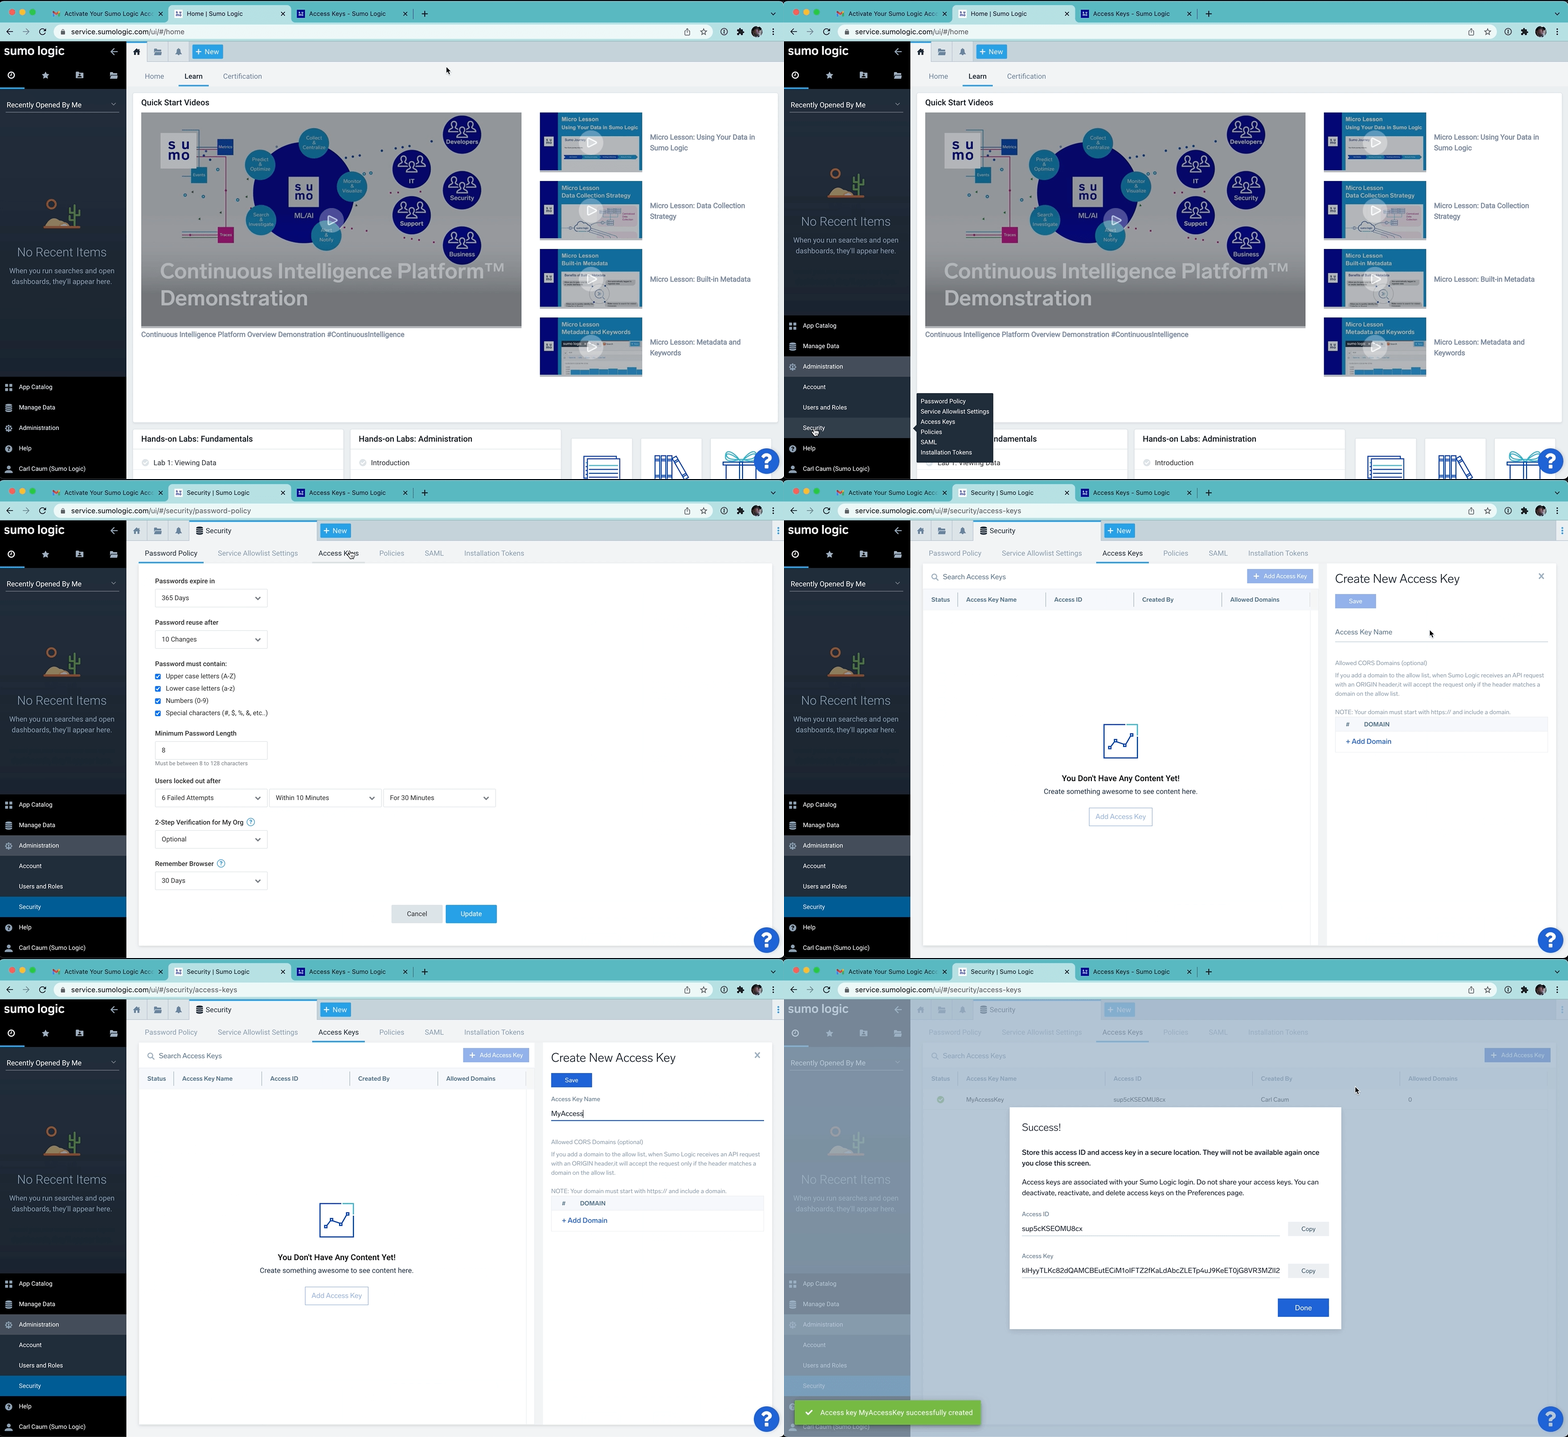
Create an access key to programatically manage your Sumo Logic account following these instructions: Manage all users’ access keys on Access Keys page.
note
Copy your access ID and key to another location. You will need them in a later step.

Step 3 - Create a GitHub personal access token
In order to create a webhook that will send data to your Sumo Logic account, the automation in this guide will need an access token for your GitHub account. For more information, see GitHub Creating a Personal Access Token.
Visit your Personal Access Tokens page in your GitHub account.
Create an access token with the following permissions:
- read:org
- admin:repo_hook
- admin:org_hook
note
Copy your access token to another location. You will need it in a later step.
Step 4 - Run the automation
Run the following command:
sh -c "$(curl -sSL https://raw.githubusercontent.com/ccaum/sumologic-solution-templates/github_getting_started_guide/software-development-optimization-terraform/scripts/getting-started)" -- github
Enter your GitHub and Sumo Logic information at the prompts:
Enter the GitHub personal access token you created in Step 3.
Enter the name of the GitHub organization you'd like to collect GitHub data on.

Enter the Sumo Logic Personal Access Token you created in Step 2.
Enter the region you created your Sumo Logic account in. Use this guide to determine which region code to provide.

The script will download a specific version of Terraform and dependent plugins and apply Terraform code. The Terraform installed will not interfere with any existing installations of Terraform.
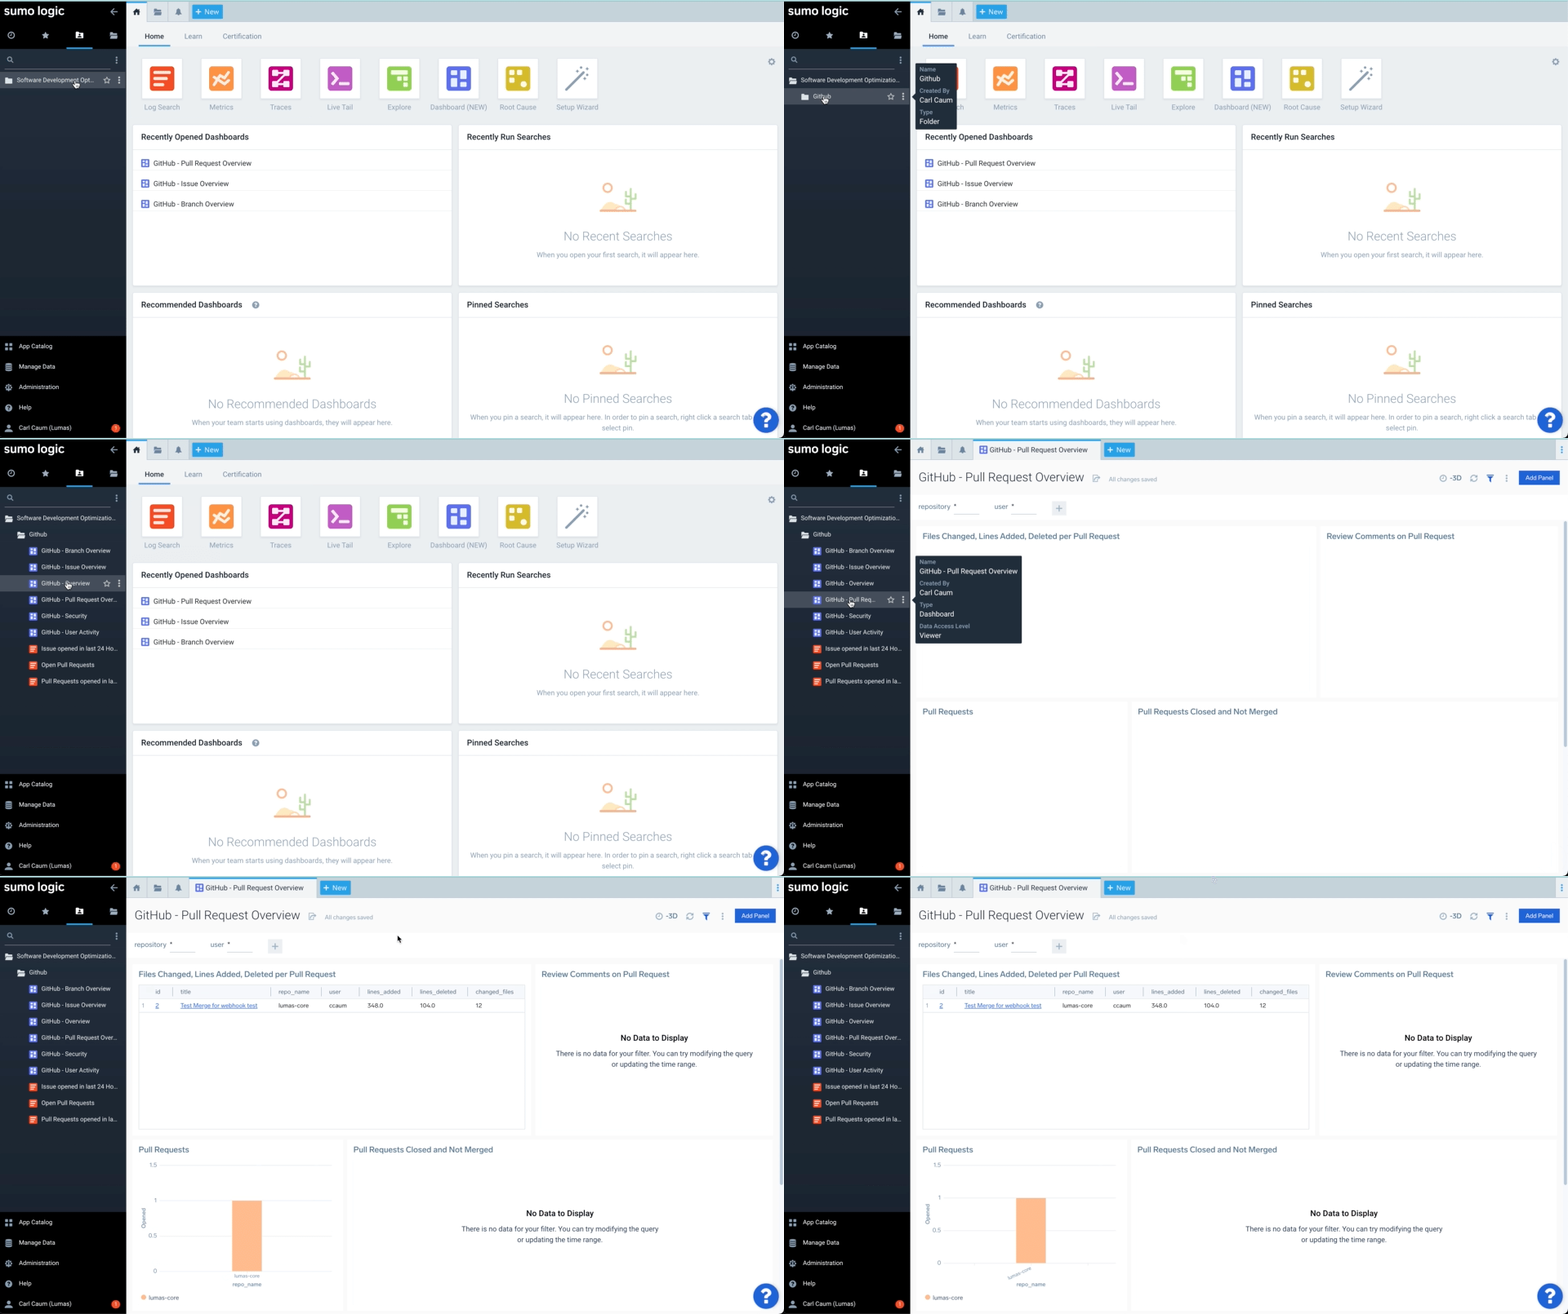
If the script completes, you will have a new folder called Software Development Optimization in your Sumo Logic Personal folder. There will be a collection of GitHub dashboards that will populate as you and your team use GitHub.
Step 5 - Verify data is being received
Create a new pull request in a repository in the GitHub organization you specified when you ran the script in Step 4.

Wait about 1 minute and then view the GitHub - Pull Request Overview dashboard in your Sumo Logic Account.