CSE User Accounts and Roles
This topic has information about creating and managing user accounts and roles for CSE. CSE uses role-based access control (RBAC). An administrator controls access to capabilities by assigning capabilities or permissions to roles, and then assigning users to roles.
The process and UI for setting users and roles depends on your CSE environment.
If your CSE URL ends in
sumologic.com, you’ll set up users and roles in the Sumo Logic platform UI. For instructions, see the following help topics:Create and Manage Roles The Sumo Logic platform allows you to assign multiple roles to a user. So, you might consider creating CSE-specific roles for different CSE user types, separate from roles you may define for Sumo Logic platform functionality. The CSE-related capabilities you can assign to roles are listed in the Cloud SIEM Enterprise section of the Role Capabilities page.
:::note When you create roles in the Sumo Logic platform, you have the option to set up a role search filter that specifies what log data users with the role may access. If you take advantage of that feature, be sure not to restrict CSE users’ access to indexes that contain CSE Records. :::
If your CSE URL ends in
jask.ai, you’ll set up user accounts and roles in the CSE UI. Follow the instructions below.
Invite a user
These instructions apply if your CSE URL ends in jask.ai.
- Click the gear icon, and choose Accounts under Users.

- On the Accounts page, click Invite.
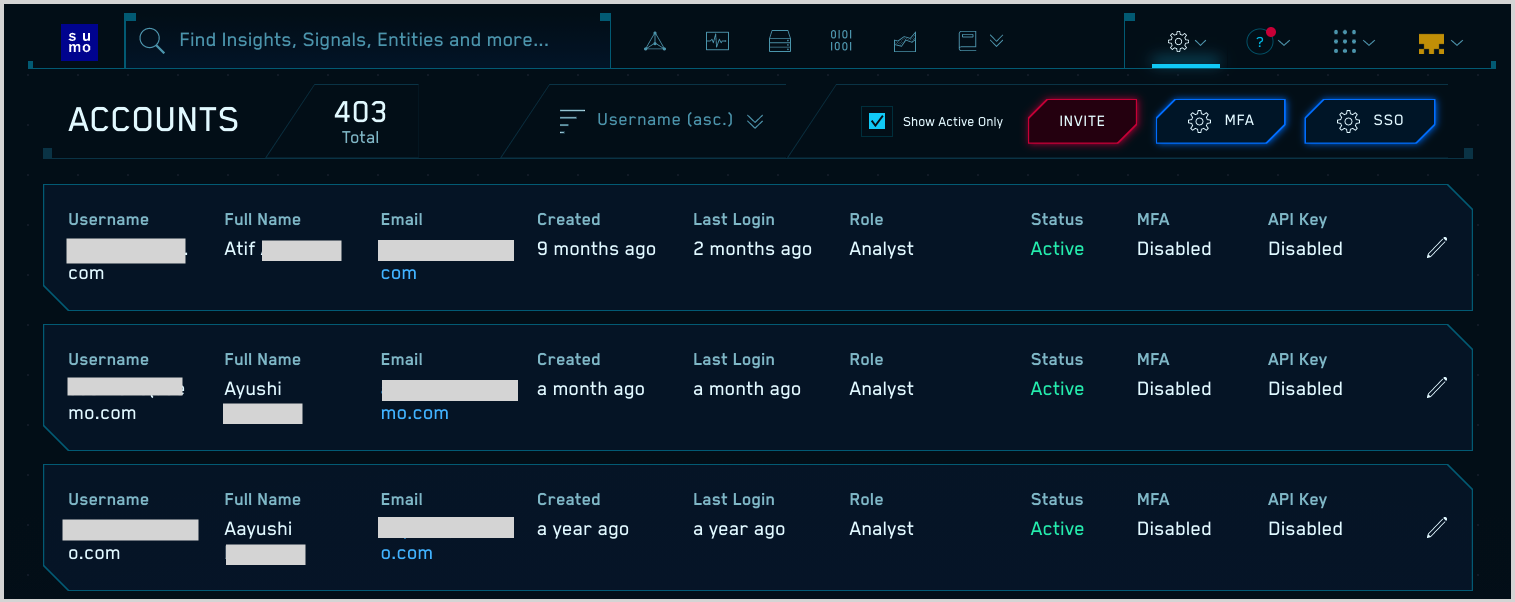
- The Invite Users popup appears.
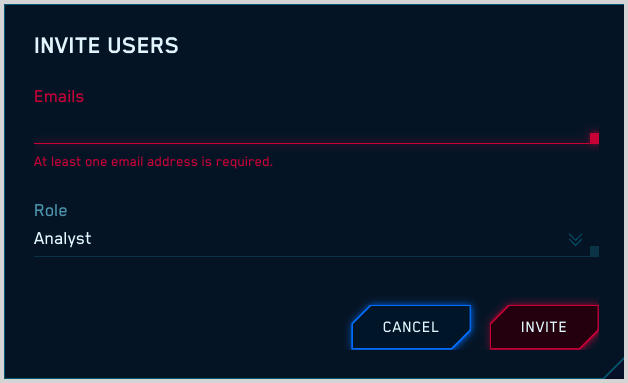
- Emails. Enter one or more email addresses. If you enter more than one address, separate them by commas.
- Role. Use the down-arrow to view a list of roles, and choose one. You can view the permissions associated with available roles on the Roles page. (Click the gear icon, and choose Roles under Users.)
- Click Invite.
The individuals you invite will be sent an email with a link to the CSE UI, like the one shown below.
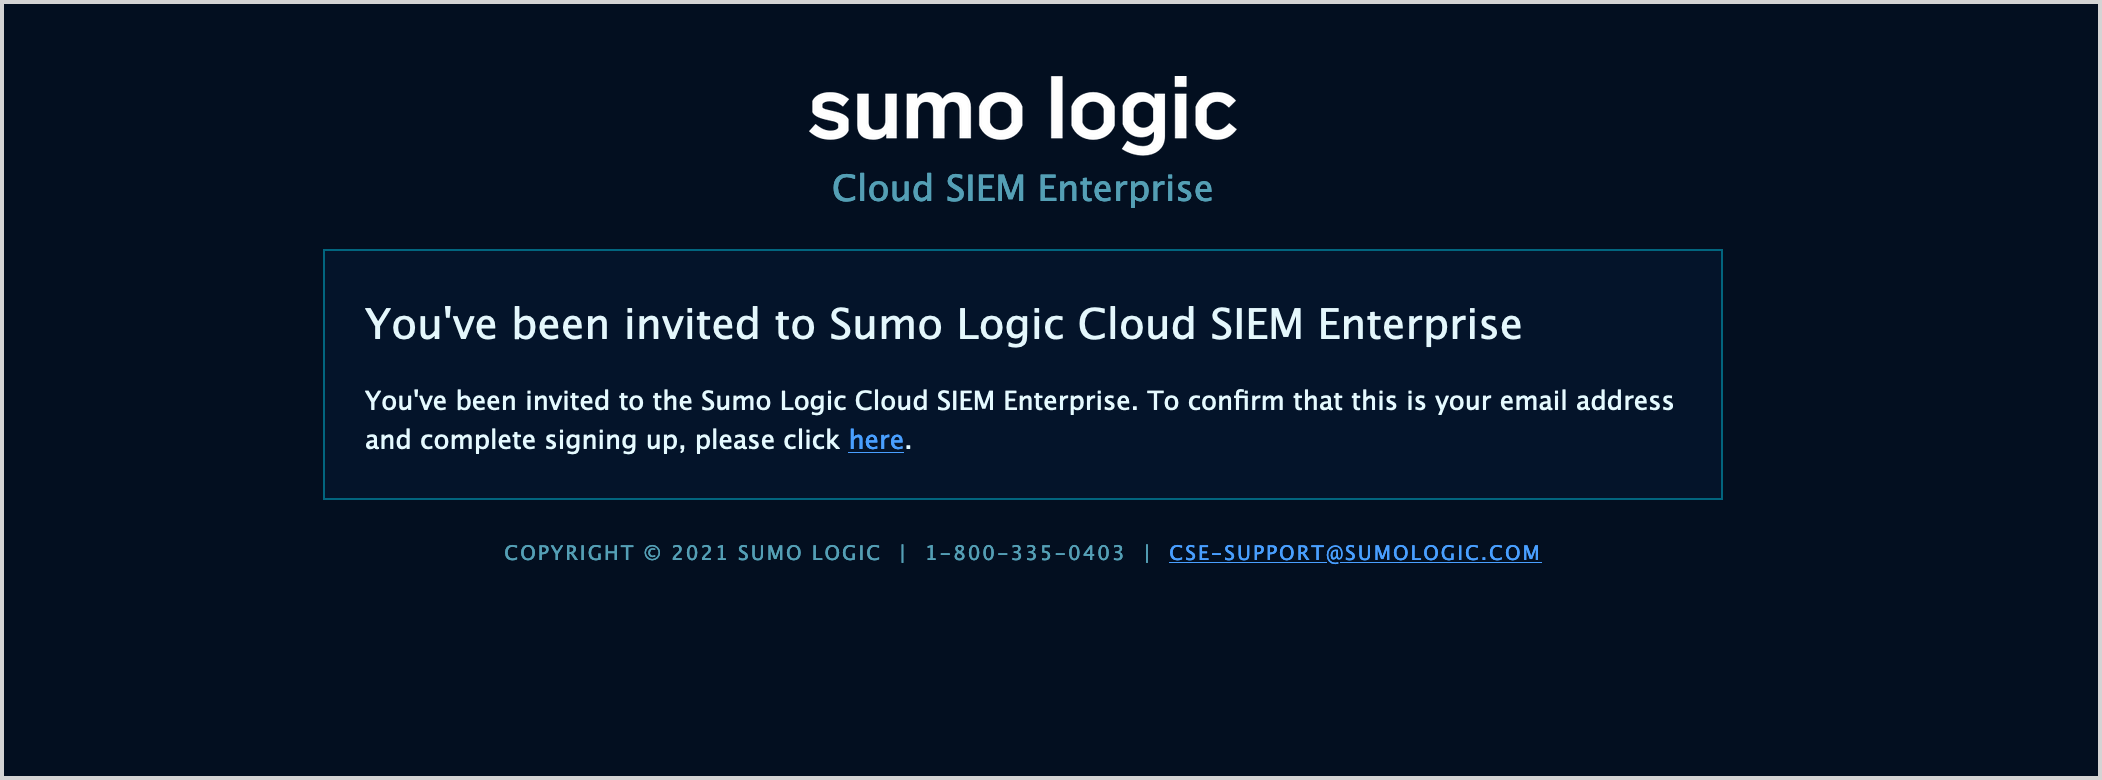
When the invitee accesses the CSE UI, they’ll be prompted to select a CSE username and password.
Create a role in CSE
A CSE role has a set of permissions associated with it. Users with that role have the permissions assigned to the role.
To create a role:
Click the gear icon, and choose Roles under Users.

The Roles page appears, and lists the roles that are already defined. There are two built-in roles that cannot be deleted or edited: Administrator and Analyst. The avatar for each user that has the role is shown―hover over it to see the user's name and username.
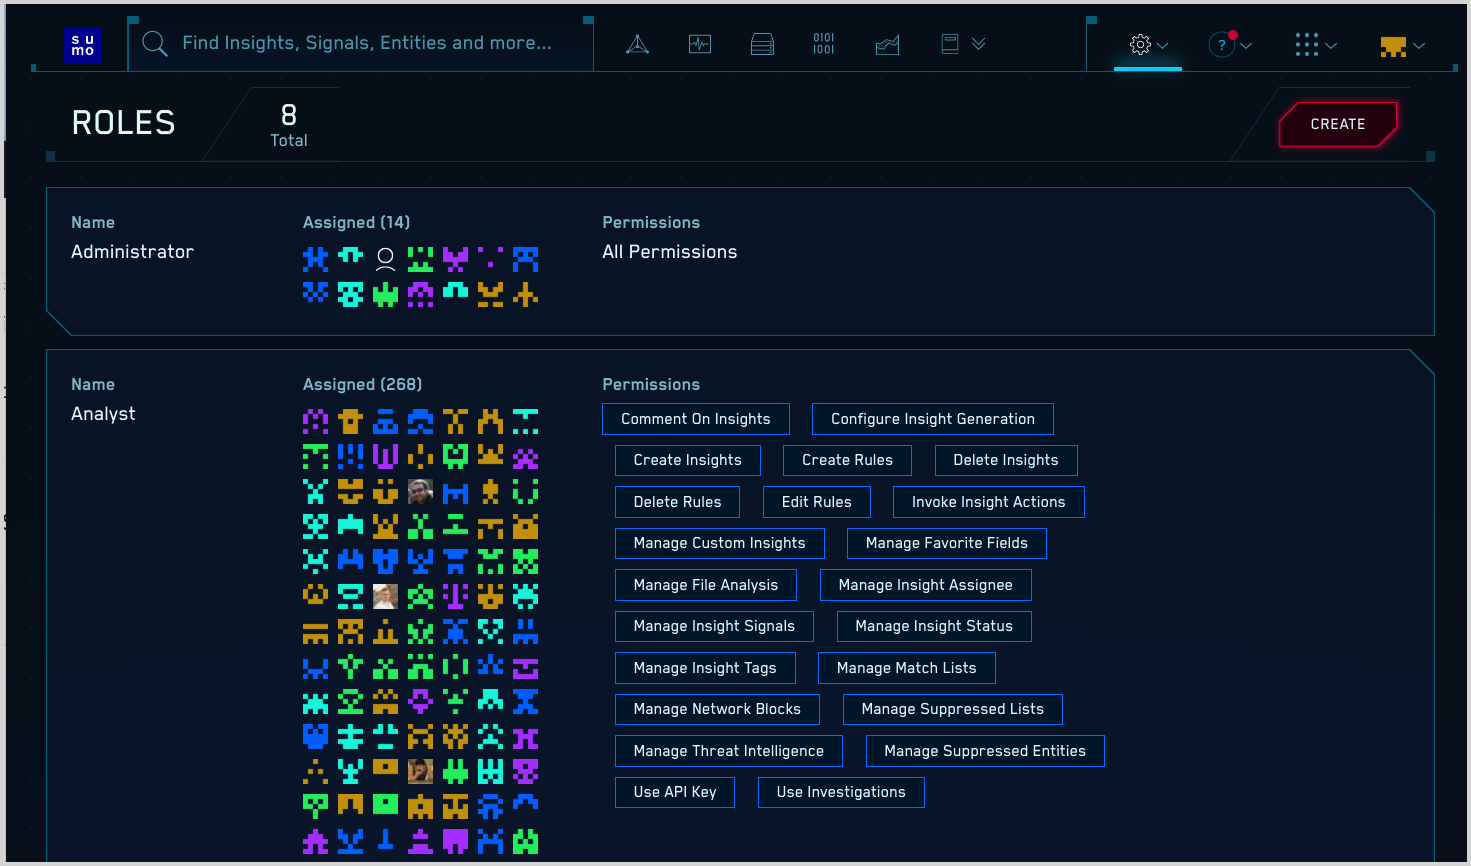
Click Create.
The Create Role popup appears.
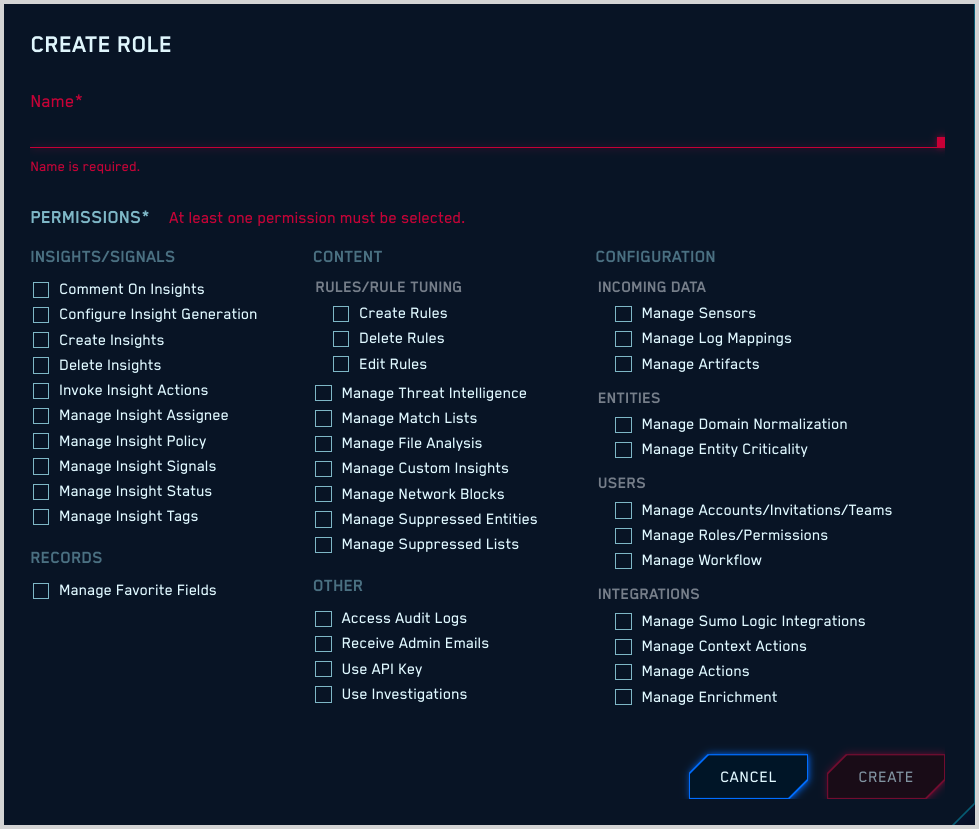
Name. Enter a name for the role.
Permissions. Checkmark each permission you want to assign to the role. For a description of each permission, see Role Permissions, below.
Click Create.
Role Permissions
Insights/Signals
[TABLE]
Records
| Permission | Description |
|---|---|
| Manage Favorite Fields | Add and remove favorite fields by clicking the star button next to the fields in CSE Records. |
Content
| Permission | Description |
|---|---|
| Create Rules | Create Rules. |
| Delete Rules | Delete Rules. |
| Edit Rules | Edit Rules. |
| Manage Threat Intelligence | Create, edit, and delete threat intelligence sources. |
| Manage Match Lists | Create, edit, and delete Match Lists. |
| Manage File Analysis | Create, edit, and delete YARA rules. |
| Manage Custom Insights | Create, edit, and delete custom Insights. |
| Manage Network Blocks | Create, edit, and delete network blocks. |
| Manage Suppressed Entities | Suppress and unsuppress Entities. |
| Manage Suppressed Lists | Create, edit, and delete lists of Record field values the presence of which will cause Signals to be suppressed. |
Other
| Permission | Description |
|---|---|
| Access Audit Logs | Allows access to audit logs using API (/api/v1/audit-logs API). |
| Receive Admin Emails | Receive account notifications when other users change their emails, passwords, API keys, and so on. |
| Use API Key | Enables use of CSE API. |
Configuration > Incoming Data
| Permission | Description |
|---|---|
| Manage Sensors | Install, configure, and uninstall CSE Sensors. |
| Manage Log Mappings | Create, edit, and delete log mappings. |
Configuration > Entities
| Permission | Description |
|---|---|
| Manage Domain Normalization | Update the configurations on CSE’s Domain Normalization page. |
| Manage Entity Criticality | Create, edit, and delete Entity Criticalities. |
Configuration > Users
| Permission | Description |
|---|---|
| Manage Accounts/Invitations/Teams | Add new CSE users, edit and remove existing CSE users. |
| Manage Roles/Permissions | Create, edit, and manage CSE user roles. |
| Manage Workflow | Create, edit, and delete Workflow statuses. |
Configuration > Integrations
| Permission | Description |
|---|---|
| Manage Sumo Logic Integrations | Create, edit, and delete Sumo Logic ingest mappings. |
| Manage Context Actions | Create, edit, and delete Context Actions. |
| Manage Actions | Create, edit, and delete the Actions. Actions are CSE notifications you can set up to occur automatically when certain state changes occur to Insights, sensors, or rules. Actions can also be invoked on-demand from an Insight in the CSE UI. |
| Manage Enrichments | Upload Insight, Signal, and Entity enrichments using the CSE API. |